Introduction:
Every application running in Kubernetes needs CPU and memory.
But what happens if a single application starts consuming all the available resources
It can slow down or even crash other critical applications running on the same node.
To prevent this, Kubernetes provides “Requests” and “Limits” to strictly control how much CPU and memory each application is allowed to use.
Definitions:
What is a Request?
A Request is the minimum amount of CPU and memory that Kubernetes reserves for a Pod.
When you define a request, Kubernetes makes sure that the required resources are available before scheduling the Pod on a node.
What is a Limit?
A Limit is the maximum amount of CPU and memory that a Pod is allowed to use.
If the Pod tries to use more resources than the configured limit, Kubernetes takes action.
- If the Pod exceeds the CPU limit, Kubernetes slows it down (CPU throttling).
- If the Pod exceeds the Memory limit, Kubernetes terminates the container (OOMKilled).
Prerequisites
- A working Kubernetes cluster
- The kubectl command-line tool is installed.
- Basic knowledge of running commands in a Linux terminal.
ALSO READ:
- The Ultimate Guide to Kubernetes Architecture: A Step-by-Step Breakdown 2026
- The Complete Kubernetes Node Maintenance Guide: 4 Proven Steps to Achieve Zero-Downtime Upgrades
- AWS S3 Backups with This Efficient Shell Script
- Jenkins Spring Boot CI/CD Pipeline: 5 Easy Steps to Master Automation
Click here to go to the GitHub repos link
Action Plan: Master Kubernetes Resources Requests and Limits
Step 1: Create the Stable Pod
Create a file named 1-stable.yaml. This pod sleeps and stays well under its 128Mi memory limit.
apiVersion: v1
kind: Pod
metadata:
  name: stable-pod
spec:
  containers:
  - name: app
    image: alpine
    command: ["sleep", "3600"]
    resources:
      requests:
        memory: "64Mi"
        cpu: "250m"
      limits:
        memory: "128Mi"
cpu: "500m"Step 2: Create the Greedy Pod
Create a second file named 2-greedy.yaml. We are using a stress-testing image that will immediately attempt to allocate 250MB of RAM, intentionally breaking its strict 128Mi limit.
apiVersion: v1
kind: Pod
metadata:
  name: greedy-pod
spec:
  containers:
  - name: memory-hog
    image: polinux/stress
    command: ["stress"]
    args: ["--vm", "1", "--vm-bytes", "250M", "--vm-hang", "1"]
    resources:
      requests:
        memory: "64Mi"
      limits:
memory: "128Mi"Step 3: Observe the Results
Monitor your pods using the -o wide flag to see exactly how Kubernetes handles the violation in real-time. Here is the terminal output from our test run:
[root@jenkins-server pod]# kubectl get pods -o wide
NAME         READY   STATUS              RESTARTS   AGE   IP           NODE
stable-pod   0/1     ContainerCreating   0          7s    <none>       kubernetes-node-1

[root@jenkins-server pod]# kubectl get pods -o wide
NAME         READY   STATUS    RESTARTS   AGE   IP           NODE
stable-pod   1/1     Running   0          16s   10.244.1.7   kubernetes-node-1

[root@jenkins-server pod]# kubectl apply -f 2-greedy.yaml
pod/greedy-pod created

[root@jenkins-server pod]# kubectl get pods -o wide
NAME         READY   STATUS              RESTARTS   AGE   IP           NODE
greedy-pod   0/1     ContainerCreating   0          9s    <none>       kubernetes-node-1
stable-pod   1/1     Running             0          33s   10.244.1.7   kubernetes-node-1

[root@jenkins-server pod]# kubectl get pods -o wide
NAME         READY   STATUS      RESTARTS   AGE   IP           NODE
greedy-pod   0/1     OOMKilled   0          11s   10.244.1.8   kubernetes-node-1
stable-pod 1/1 Running 0 35s 10.244.1.7 kubernetes-node-1The Breakdown
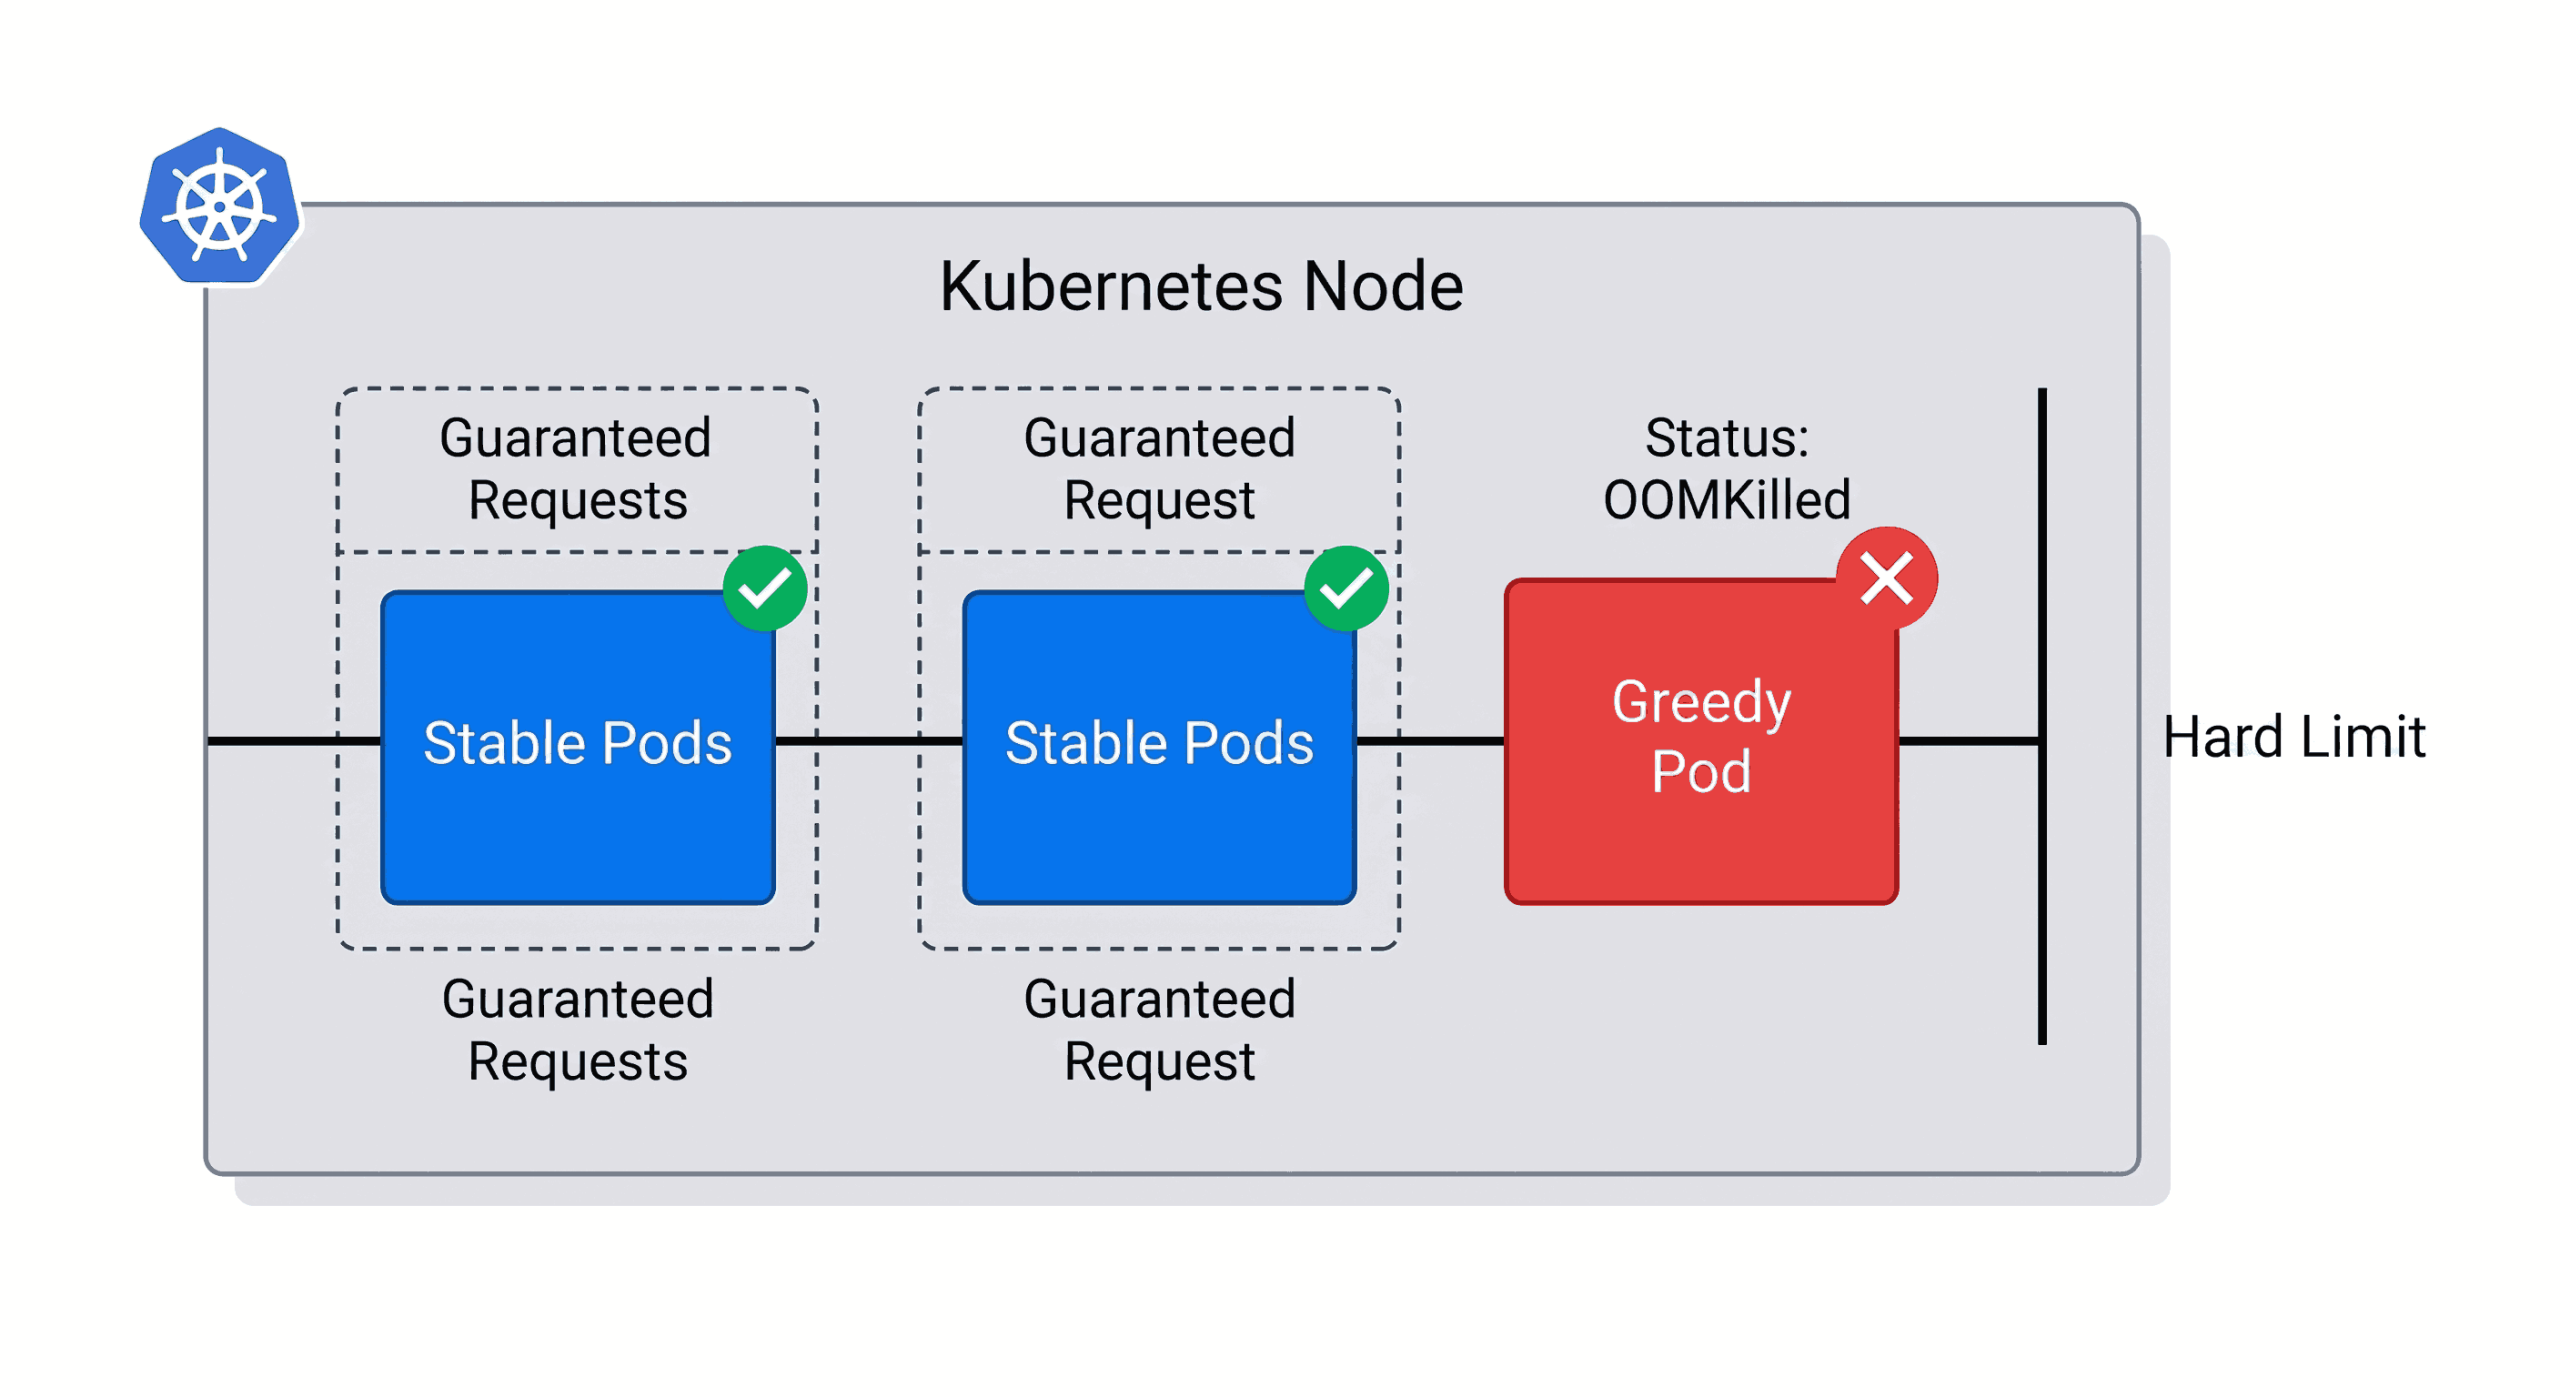
Here is exactly what happened during our test:
- The Greedy App was stopped: As soon as it tried to use too much memory, the system shut it down instantly (
OOMKilled). - The Server was protected: The system killed the bad app automatically to save the rest of the server from crashing.
- The Stable App survived: Even though it was running on the exact same server, the stable app was completely unaffected and kept working perfectly.
- The Proof: This shows exactly why Limits are so important. They act as a safety net, stopping one broken application from taking down your entire infrastructure.