
Setting Up AWS VPC Manually: A Step-by-Step Guide
Objective:
The fundamentals of AWS VPC, or AWS Virtual Private Cloud (VPC), are through manual creation and configuration. It starts by creating an EC2 instance and setting up a VPC, subnets, an internet gateway, and a route table. After completing this tutorial, you will have a functional VPC configuration to access online.
Prerequisites:
Before you begin, ensure you have the following:
- AWS Free Tier Account—To access AWS services.
- Basic AWS Knowledge—Familiarity with the AWS console.
- SSH Key Pair—Required to connect to EC2 instances.
- Basic Networking Concepts—IP addresses, subnets, and routing.
AWS VPC Introduction:
Amazon Virtual Private Cloud (VPC) allows you to create an isolated network within AWS where you can deploy and manage your cloud resources securely. Understanding VPC is crucial before automating infrastructure using Terraform. This guide walks through the manual process of setting up a VPC, subnets, an internet gateway, a route table, and an EC2 instance.
ALSO READ:
- Effortless AWS EC2 Deployment with Terraform: Automate Your Infrastructure Today!.
- Nginx Process Alert: An Efficient Shell Script Solution (2024)
- Step-by-Step Git Workflow: Managing a Project with Git and GitHub 2024
Why Do We Need an AWS VPC?
- A VPC is essential for:
- Security—isolating resources from the public internet.
- Network Control—Defining custom IP ranges, subnets, and routing rules.
- Scalability—Expand the network with multiple subnets and services.
- Customization—Enabling private and public resources in a controlled manner.
- Internet Access—Allowing selected resources (like EC2 instances) to connect to the internet.
AWS VPC Architecture Flow Diagram

Step-by-Step Guide to Creating a VPC Manually
-
Create a VPC
-
- Go to AWS Console → VPC Dashboard → Create VPC.
- Set a Name tag (e.g., My-Terraform-VPC).
- Choose IPv4 CIDR Block: 10.0.0.0/16 (this allows 65,536 IPs).
- Click Create VPC.
-
Create Public & Private Subnets
-
- In the VPC Dashboard, navigate to Subnets → Create Subnet.
- Select My-Terraform-VPC.
- Create a public subnet:
- Name: Public-Subnet
- CIDR: 10.0.1.0/24
- Availability Zone: us-east-1a
-
Create a Private Subnet:
-
- Name: Private-Subnet
- CIDR: 10.0.2.0/24
- Availability Zone: us-east-1b
- Click Create Subnets.
Create an Internet Gateway (IGW)
- Go to Internet Gateways → Create Internet Gateway.
- Name it My-IGW.
- Attach it to My-Terraform-VPC.
Create a Route Table for the Public Subnet
- Go to Route Tables → Create Route Table.
- Name it Public-RT and associate it with My-Terraform-VPC.
- Add a new route:
- Destination: 0.0.0.0/0 (All traffic)
- Target: My-IGW (Internet Gateway)
- Associate this route table with Public-Subnet.
NOTE: Without routing, our public instances cannot reach the internet.
Launch an EC2 Instance in the Public Subnet
- Go to EC2 Dashboard → Launch Instance.
- Select Amazon Linux/Ubuntu (Free Tier Eligible).
- Choose Instance Type: t2.micro.
- Select VPC: My-Terraform-VPC.
- Choose Subnet: Public-Subnet.
- Enable Auto-Assign Public IP.
- Configure Security Group:
- Allow SSH (Port 22) from 0.0.0.0/0.
- Allow HTTP (Port 80, Optional) for web access.
- Launch the instance and connect via SSH.
AWS VPC Verifying the Setup
To confirm the EC2 instance is accessible:
- Check the Public IP in the AWS Console.
- Open a terminal and run. If connected, your setup is correct!
AWS VPC Deleting Everything (Cleanup Process)
To avoid charges, delete the resources in this order:
- Terminate EC2 Instance → EC2 Dashboard → Actions → Terminate.
- Delete Internet Gateway → Detach & Delete.
- Delete the route table (if created separately).
- Delete subnets (public & private).
- Delete VPC (only possible after deleting the above components).
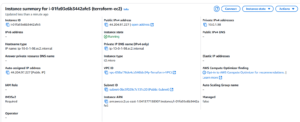
Example Screenshots:
VPC Creations:

Create Public & Private Subnets:


Create an Internet Gateway (IGW):

Create a route table for the public subnet:

Launch an EC2 instance in the public subnet:
Thank you for visiting! In this guide, we manually set up a VPC, subnets, an internet gateway, a route table, and an EC2 instance in AWS.
Next Action:
—————
Next, we will automate this entire process using Terraform! Stay tuned for the upcoming guide.