How to install Linux Server Monitoring tool Nagios XI and NCPA
Monitoring servers is maintaining their health and performance. Paired with the Nagios Cross-Platform Agent (NCPA), Linux Server Monitoring Nagios XI is a powerful solution for Linux server monitoring. This guides Nagios XI, in setting up NCPA on client-server monitoring. With these steps, you can efficiently manage your server monitoring, ensuring reliability and performance.
Guide to Linux Server Monitoring with Nagios XI and NCPA Objective:
Install Nagios XI in nagios server
Set up NCPA on client servers for monitoring.
Configure NCPA settings and firewall rules to ensure secure communication.
Guide to Linux Server Monitoring with Nagios XI and NCPA Prerequisites:
- Access to a Linux server to host Nagios XI.
- Root access or administrative privileges on both systems.
- Basic understanding of Linux terminal commands.
- Stable internet connection for downloading packages.
Nagios XI install Action Plan:
Step 1 :
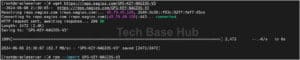
Download the Nagios GPG key and import it.
wget https://repo.nagios.com/GPG-KEY-NAGIOS-V3
rpm --import GPG-KEY-NAGIOS-V3
Step 2 :
Configuring a YUM repository for Oracle Linux 7. Make sure to enable 1
Sure, if you set enabled=1, the repository is on; if you set enabled=0, it’s off.
vi /etc/yum.repos.d/oracle-linux-ol7.repo

Step 3 :
Nagios XI quick installation runs the below command in the terminal
curl https://assets.nagios.com/downloads/nagiosxi/install.sh | sh
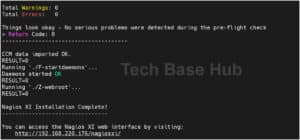
Step 4:
Finalize the installation
http://<Nagios_server_ip>/nagiosxi/
Set the time zone (optional)
Change here is the Administrator Password
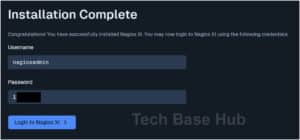
and click the finish install complete the installation
Step 5 :
Login the Nagios XI using your username and password
username : nagiosadmin
password : <your_password>
Click the Login to Nagios XI button to begin.
Installing NCPA on Client Servers Action Plan:
Step 1 :
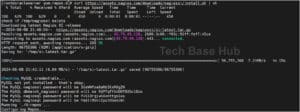
To install the latest version of NCPA (Nagios Cross-Platform Agent) on your system run the below command
rpm -Uvh https://assets.nagios.com/downloads/ncpa/ncpa-latest.el8.x86_64.rpm

Step 2 :
To install NCPA (Nagios Cross-Platform Agent) use the below command
yum install ncpa -y
Step 3 :
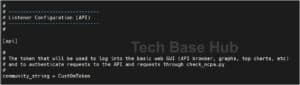
Configure the ncpa config file ‘ncpa.cfg’
vi /usr/local/ncpa/etc/ncpa.cfg
Set the community_string parameter to a custom token for authentication.
community_string = Cust0mToken
Step 4 :
Apply the changes by restarting the NCPA service
service ncpa_listener restart
Step 5 :
Firewall Configuration
firewall-cmd --zone=public --add-port=5693/tcp

firewall-cmd --zone=public --add-port=5693/tcp --permanent

Step 6 :
goto settings > Configuration Wizards
Search for the Linux Server Configuration Wizard
File the IP address, Token, And system eg (oracle)
click on Next and finish the installation procedure

Step 7 :
Verify the Nagios XI client host
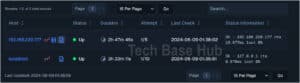
Now that we’ve successfully installed Nagios XI and NCPA on our server, we can monitor the server’s performance and health
Thank you