Step-by-Step Guide to Linux Extend Partition with LVM
Managing disk space efficiently is crucial for Linux system administrators. Linux Extend Partition The Logical Volume Manager (LVM) simplifies this task by allowing dynamic resizing of partitions without system downtime.
Linux Extend Partition with LVM Objectives:
- Install a new hardware disk drive
- Create a new partition
- Create a physical volume (PV)
- Extend the volume group (VG)
- Extend the logical volume (LV)
- Resize the file system
- Verify the mount point
Linux Extend Partition with LVM Prerequisites:
- Basic knowledge of Linux commands
- Access to a Linux system with root or sudo privileges
- Familiarity with a terminal or command-line interface
NOTE:
Adjust partition names (/dev/sda, /dev/sda1, etc.) according to your server setup and file system for accurate functionality and fit.
ALSO READ:
Action Plan:
Step 1 :
Install a New Hardware Disk Drive:
The List of all available disks.
lsblk
Identify the new disk with
fdisk -l
Step 2 :
Create a New Partition:
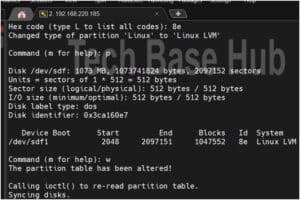
Launch fdisk for the new disk:
fdisk /dev/sdf
Enter the following commands within fdisk:
- n (create a new partition)
- p (primary partition)
- Specify partition number and sector values, or use default values.
- Change the partition type to Linux LVM (hex code 8e).
- w (write changes and exit).
- Create a Physical Volume (PV):
Step 3 :
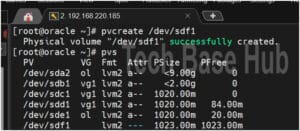
Create a physical volume:
pvcreate /dev/sdf1
Verify the new physical volume:
pvs
or
pvdisplay
Step 4 :
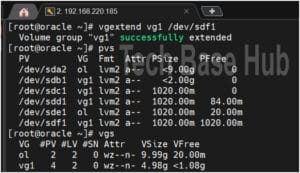
Extend the Volume Group (VG):
vgextend vg1 /dev/sdf1
Verify the volume group:
vgs
or
vgdisplay
Step 5 :
Extend the Logical Volume (LV):
lvextend -L +500M /dev/vg_name/lv_name
Step 6 :
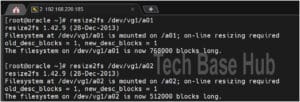
Resize the file system on the logical volume:
resize2fs /dev/vg_name/lv_name
Step 7 :
Verify the Mount Point:
Ensure the mount point reflects changes:
lsblk
or
df -TH

We have successfully extend the mount points ‘/a01‘ and ‘/a02‘.
Thank You

